
Part 3: Installing the GPU — and a Slot Discovery I Wasn’t Expecting
In Part 2, I got the OptiPlex physically ready: new CPU, fast NVMe storage, a large ROM drive, an upgraded PSU and some extra cooling.
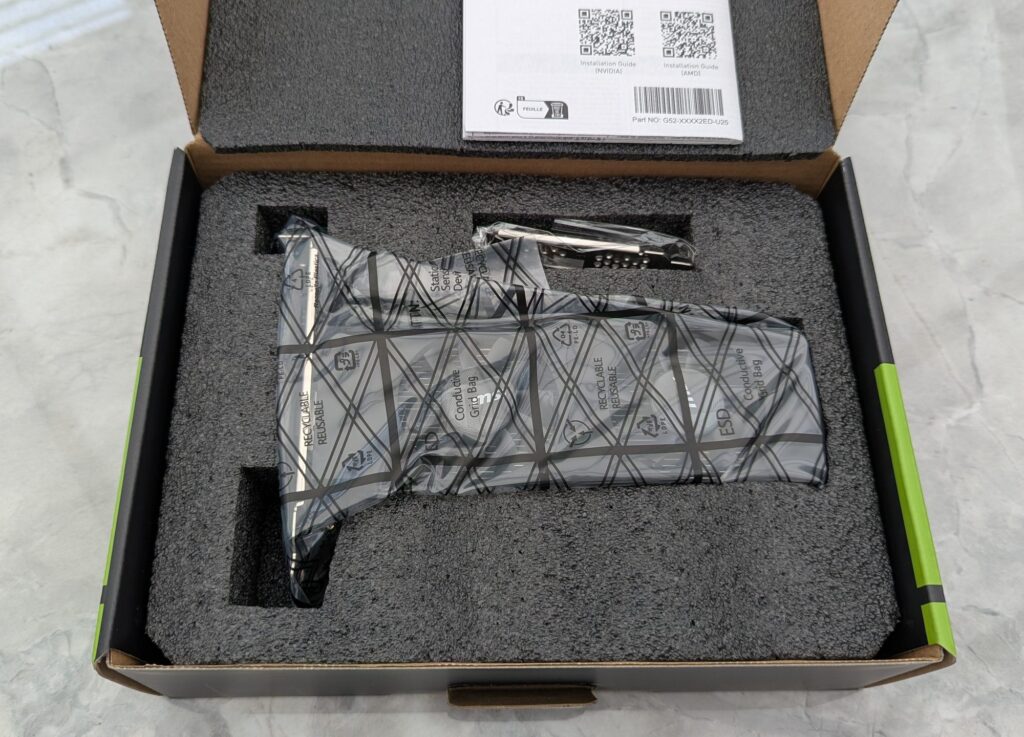
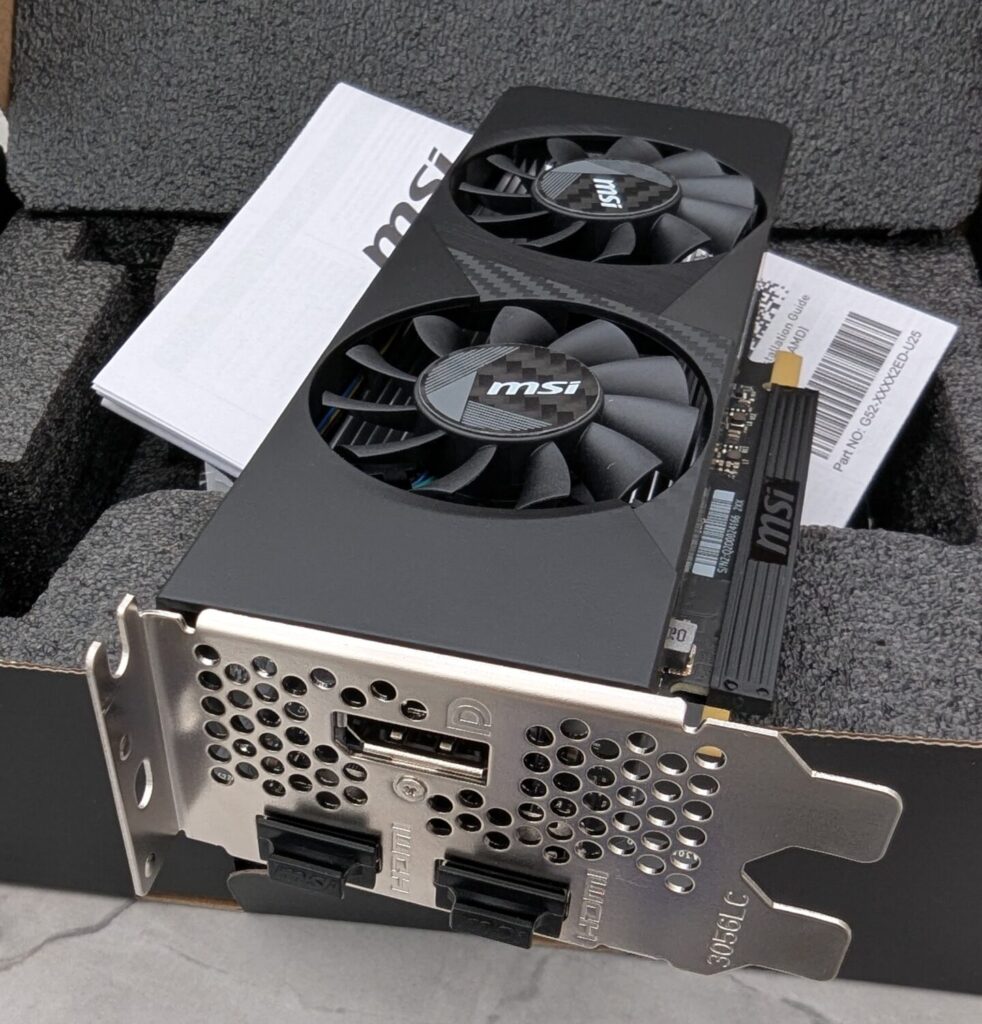
This part is about the component that could make the biggest difference to the whole project — the MSI GeForce RTX 3050 Low Profile, specifically the LP 6G OC variant.
It didn’t go quite as straightforwardly as I expected, and the reason why turned into one of the more interesting technical detours of this entire build.
MSI GeForce RTX 3050 LP 6G OC
This is the low-profile GPU I installed for this build — small enough to fit the SFF chassis, and it draws its full 70W straight from the PCIe slot itself, so no supplementary power connector is needed.
Check the current price and availability on Amazon UK.
Affiliate Disclosure: This post contains Amazon affiliate links. If you purchase a product through one of these links, I may earn a small commission at no additional cost to you. I only recommend products that I have personally used or believe are worth considering.
Why the RTX 3050 LP 6G OC
I covered the reasoning behind a low-profile card in Part 1, but it’s worth restating exactly why this specific model matters for a build like this.
The 5060 SFF chassis imposes two hard constraints on any GPU:
- Physical size. A conventional full-height gaming GPU simply will not fit. The card needs a genuine low-profile bracket, not just a “compact” one.
- Power delivery. With a 240W PSU (see Part 2), I needed a card that wouldn’t push the system into risky territory.
The LP 6G OC is specifically built for this kind of scenario:
- 174 × 69 × 42mm — small enough to fit inside the SFF’s height restriction
- 70W power draw, pulled entirely from the PCIe slot itself — no 6-pin or 8-pin power connector needed at all
That last point matters more than it might seem. The OptiPlex’s PSU doesn’t have a spare PCIe power connector to offer a GPU in the first place, so a card that draws its full power from the slot was effectively a requirement, not just a nice-to-have.
An Alternative I Considered
Before settling on the MSI card, I also looked at the Maxsun RTX 3050 SLP 6G.
The interesting thing about the Maxsun card is that it’s a genuine single-slot design — physically slimmer than the MSI, and (as it turned out) would actually have fit into the x16 slot rather than being restricted to the x4 slot the way the MSI ended up being, given the PSU clearance issue I ran into below.
In the end, cost decided it. The Maxsun card came in considerably more expensive than the MSI, which I picked up for £179.99. Given the price difference, and without yet knowing for certain the x16 slot wasn’t usable anyway, going with the MSI was the more sensible call at the time.
With the benefit of hindsight — knowing what I now know about the x4 bandwidth ceiling — the Maxsun would likely have been the technically better choice if budget allowed. Worth keeping in mind if you’re planning a similar build and the PSU-clearance problem I hit doesn’t apply to your specific case.
Maxsun GeForce RTX 3050 SLP 6G (Single-Slot)
The alternative I considered before going with the MSI card. This one’s a genuine single-slot design that would actually fit the OptiPlex’s full x16 slot rather than being restricted to x4 — the technically better option if the price difference works for your budget.
Check the current price and availability on Amazon UK.
Affiliate Disclosure: This post contains Amazon affiliate links. If you purchase a product through one of these links, I may earn a small commission at no additional cost to you. I only recommend products that I have personally used or believe are worth considering.
Fitting the Card
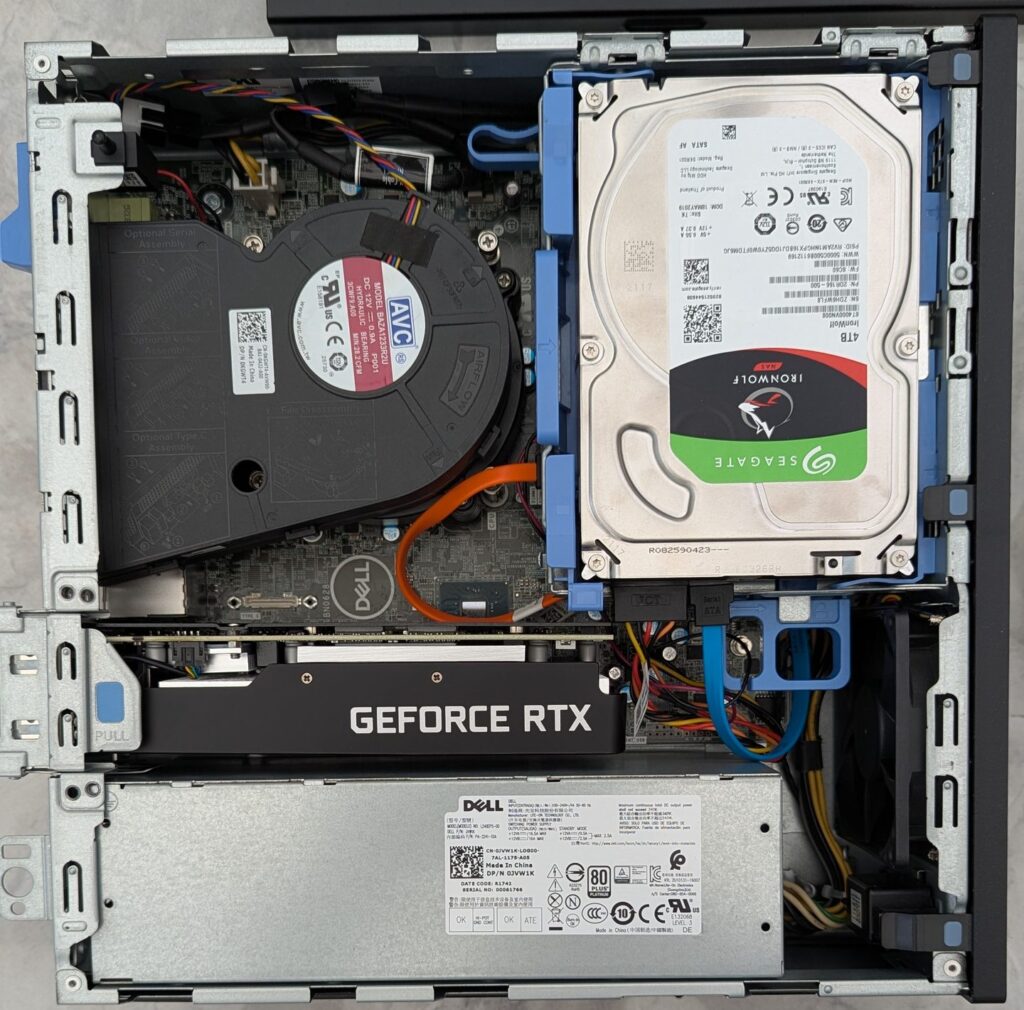
Physically installing the card was straightforward — remove the expansion slot cover, seat the card in the PCIe slot, secure the bracket, connect nothing else since there’s no supplementary power cable required.
Except it wasn’t quite that simple.
The Slot Problem
The 5060 SFF motherboard actually has two PCIe slots: a full-length x16 slot, and a second, physically shorter x4 slot.
I’d assumed — reasonably, I thought — that the GPU would go into the x16 slot, since that’s the one built for full-bandwidth expansion cards.
It turned out that wasn’t an option in my case. The PSU physically sits right in the path of the x16 slot’s position, and there simply isn’t room for a card there — even with the GPU sitting in the x4 slot instead, the clearance between the GPU and the PSU is only around 1–2cm. Putting a card into Slot 1 would have meant it colliding directly with the power supply itself.
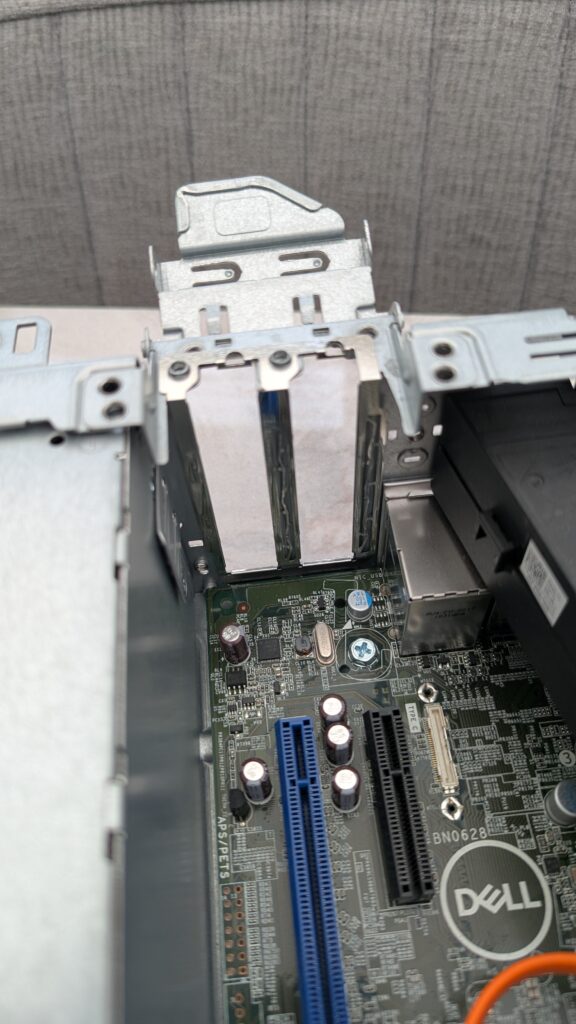
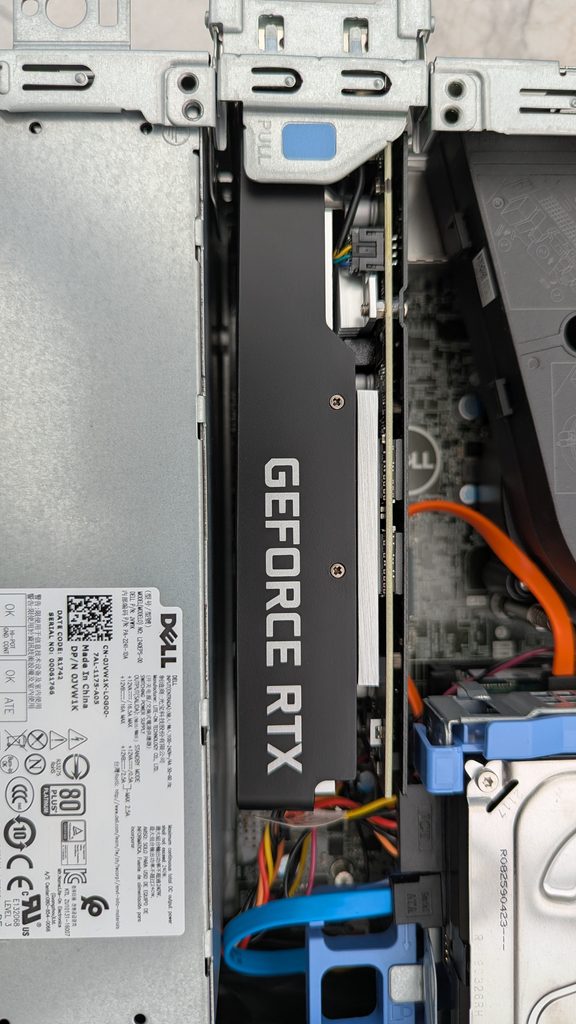
The card physically fits into the shorter x4 slot at all because consumer GPUs always use a full x16-length edge connector regardless of how many lanes are actually wired underneath — and this particular slot is “open-ended,” meaning there’s no plastic stop blocking the extra length of the connector from sitting in it. The unused portion of the card’s edge connector simply overhangs past the end of the slot, doing nothing.
Electrically, though, that means the card is only running at PCIe x4, not x16.
Does This Actually Matter?
My first instinct was that this was a real problem — quartering the available bandwidth to the GPU sounded like exactly the kind of thing that could undermine the whole point of adding a discrete card.
After digging into it properly, the picture turned out to be more nuanced than that.
- PCIe 3.0 x4 offers roughly 3.9GB/s of bandwidth, compared with around 15.75GB/s at x16.
- For a card in the RTX 3050’s performance tier, the GPU’s own compute capability is generally the limiting factor before PCIe bandwidth is, in most native workloads — the typical real-world impact for a card like this is only around 5–10%.
- Where it’s more relevant is specifically in emulation workloads like RPCS3 and Xenia, which lean more heavily on texture streaming and CPU↔GPU data movement than a typical native game. A narrower bus is more likely to show up as stutter in exactly these kinds of heavy, streaming-dependent scenes.
So: not a disaster, but not nothing either — and definitely something worth actually verifying rather than assuming either way.
Verifying the Link Is Actually Healthy
Bandwidth ceiling aside, the next question was whether the x4 link was even running correctly at its full rated speed, or whether something about the fit — an open-ended slot, an internal riser, a marginal contact — was causing it to negotiate down to something worse.
This is where I turned to the terminal rather than guesswork.
SSHing into Batocera, I ran:
lspci -vv -s 02:00.0 | grep LnkSta
(replacing the bus ID with whatever lspci reports for the GPU on your own system)
The Confusing First Result
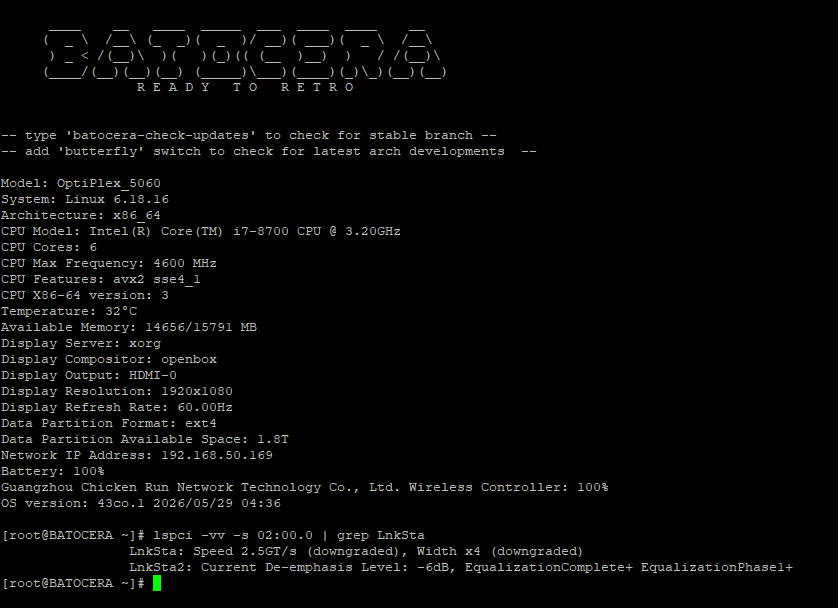
My first check, run while the system was just sitting idle, showed this:
LnkSta: Speed 2.5GT/s (downgraded), Width x4 (downgraded)
2.5GT/s is PCIe Generation 1 speed — a quarter of the card’s rated Gen 3 speed. At first glance, that looked like a genuine fault on top of the physical slot limitation.
It wasn’t. NVIDIA GPUs deliberately downclock their PCIe link to the lowest possible speed at idle to save power, then ramp back up to full negotiated speed only under active load. Checking the link speed with nothing actually rendering on the card was checking the wrong thing entirely.
Testing It Properly, Under Load
The real test needed the GPU actually working. I launched an emulator, got into an actively rendering scene, and from a second SSH session ran:
watch -n 0.5 "lspci -vv -s 02:00.0 | grep LnkSta"
This time, under real load, the result was:
LnkSta: Speed 8GT/s, Width x4 (downgraded)
LnkSta2: Current De-emphasis Level: -6dB, EqualizationComplete+ EqualizationPhase1+
8GT/s is full PCIe Gen 3 speed. The link is healthy — it’s genuinely running at the full speed the x4 connection is capable of. The “(downgraded)” label in lspci‘s output is just comparing against the card’s maximum possible rating of x16; it’s descriptive of the slot’s physical limitation, not a sign of a fault.

So the conclusion here: the x4 constraint is real and permanent given this chassis, but the link itself isn’t damaged, degraded or misconfigured — it’s operating exactly as a healthy x4 Gen 3 connection should.
What I’m Doing About the Bandwidth Ceiling
Given the slot itself can’t be changed, the remaining options are about squeezing the most out of what’s available rather than fixing a fault:
- Checking BIOS power-saving link states (ASPM). These can cause the link to downshift speed during idle-to-load transitions, which on an already-narrow x4 connection is more noticeable than it would be on a full x16 link.
- Checking for Resizable BAR / Above 4G Decoding support in BIOS. If available, this lets the GPU expose its VRAM as one contiguous address space, cutting down on transaction overhead — more valuable specifically on a bandwidth-limited connection.
- Keeping emulator resolution scale close to native rather than oversampling, since higher internal resolution means more data moving across that narrower bus every frame.
- Leaning on asynchronous shader compilation in RPCS3 and Xenia, which reduces how much the emulator depends on synchronous, blocking CPU↔GPU handoffs in the first place.
I’ll be reporting back on whether any of this makes a measurable difference once I get into proper game testing in Part 7.
Power Draw in Practice
With the card installed and confirmed running correctly, the other thing worth checking was how it actually behaves against the 240W PSU headroom discussed in Part 2.
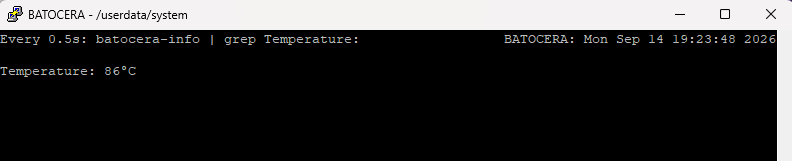
I’ll be watching this closely as testing gets more demanding in Part 7 — the LP 6G OC’s rated 70W draw leaves theoretical headroom on a 240W supply alongside the i7-8700, but rated figures and sustained real-world draw under a demanding open-world PS3 title aren’t always the same thing, and it’s the kind of thing worth confirming with real numbers rather than assuming.
Where the Build Stands Now
| Component | Status |
|---|---|
| GPU | MSI RTX 3050 LP 6G OC — installed, PCIe x4 (Gen 3, confirmed healthy under load) |
| CPU | Intel Core i7-8700 |
| RAM | 16GB |
| Storage | 512GB NVMe (OS/cache) + 4TB IronWolf (ROMs) |
| PSU | 240W |
| Cooling | Stock + additional front exhaust fan |
The hardware side of this project is now essentially complete. What’s left is turning it into an actual working retro gaming machine.
What’s Next?
This slot discovery genuinely changed how I think about this chassis — “will it fit in the case” and “will it fit in the slot I expected” turned out to be two different questions entirely, and it’s the kind of thing that’s easy to miss if you don’t actually check.
Part 4 covers installing and configuring Batocera itself — the actual OS this whole project is built around, and the starting point for everything from here on: ROM storage, controllers, and eventually PS3 and Xbox 360 testing with the GPU now properly in place.
That’s next.