
Part 1: The Project, The Hardware and Why I Chose the OptiPlex 5060
Can an old Dell OptiPlex 5060 SFF be turned into a serious retro gaming PC capable of going well beyond the usual emulation systems and into PlayStation 3 and Xbox 360?
That’s what I’m hoping to find out.
I’ve been wanting to build a proper retro gaming machine for a while. I’m an avid gamer and have built up a pretty good collection of retro technology over the years, so this isn’t my first attempt at creating a dedicated retro gaming system.
However, this time I wanted to do something a little different.
Rather than buying a brand-new gaming PC and spending hundreds of pounds on components, I wanted to see how far I could push hardware I already had sitting around my office and homelab.
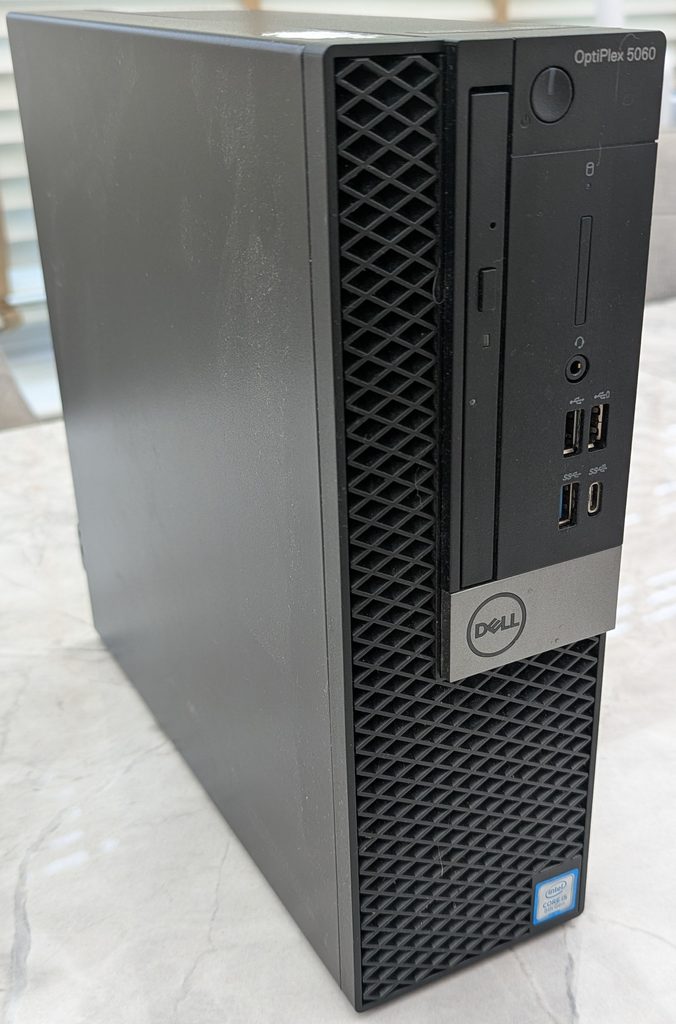
The result is this project: turning a Dell OptiPlex 5060 Small Form Factor into a dedicated Batocera retro gaming machine.
And there is one more important part of the plan.
I’ve already picked up an MSI GeForce RTX 3050 Low Profile to go into it.
That GPU could completely change what this little OptiPlex is capable of.
Before getting it installed, though, I wanted to establish exactly what the machine could do on integrated graphics alone.
A Note on Games and ROMs
Before going any further, a quick note on something that comes up with any article like this.
Every title covered across this series is one I own — a mix of games from my own physical collection, built up over years, and digital purchases. I’m not going to get into the specifics of ROM or ISO acquisition anywhere in this series; if you’re following along and building something similar, dumping your own discs is the approach I’d point you toward.
What Is This Project About?
The idea behind this project is quite simple:
Take hardware I already own, upgrade it where necessary and build the best retro gaming machine I can without spending a fortune.
I’m not trying to build the most powerful gaming PC possible.
I’m also not interested in simply buying the latest hardware and putting it into a case.
The challenge is making something useful from what I already have.
The OptiPlex 5060 is a particularly interesting starting point because it is a business desktop rather than a gaming machine.
It’s compact, relatively inexpensive and has a Small Form Factor (SFF) chassis.
That immediately introduces some limitations.
There isn’t a huge amount of room inside the case, cooling is more restricted than on a conventional desktop and the original SFF configuration was designed around a modest power supply. Dell’s specifications list a 200 W PSU for the OptiPlex 5060 SFF; I’ve upgraded my particular machine to a 240 W PSU as part of this project.
Those limitations make the project considerably more interesting.
I’m essentially trying to turn an office PC into a console-sized emulation machine.
My Previous Retro Gaming Projects
This isn’t my first attempt at building a retro gaming system.
I’ve previously built a RetroPie system using a Raspberry Pi 4, which I installed inside a NESPi 4 case.
The NESPi 4 is a fantastic little case for creating something that looks and feels much more like a traditional games console. I also used a removable SSD, which made managing the system and game collection much easier.
However, the Raspberry Pi 4 has its limits.
It’s an excellent platform for older systems and lightweight emulation, but once you start pushing towards more demanding consoles, the hardware becomes the limiting factor.
I’ve also spent some time with inexpensive handheld devices such as the R36 Ultra and TrimUI Smart Pro.
These have been great little devices and are perfect for portable retro gaming.
But again, you’re ultimately restricted by the hardware inside the device.
That’s what makes this project different.
With the OptiPlex, I have considerably more CPU performance, more storage options, desktop-class hardware and, importantly, the possibility of adding a dedicated graphics card.
Why the Dell OptiPlex 5060?
The OptiPlex 5060 wasn’t purchased specifically for this project.
That’s actually one of the things I like about it.
It was already hardware I had available, and I started looking at whether it could be repurposed as a serious emulation machine.
The SFF chassis is particularly attractive for a retro gaming PC.
Dell’s specifications put the SFF chassis at approximately 29.0 × 9.26 × 29.2 cm, so it has a relatively small footprint compared with a conventional desktop PC. The motherboard also provides a half-height PCIe slot for a discrete GPU — which, as I’ll get into in Part 3, turned out to come with some interesting limitations of its own once I actually tried to fit a card in it.
The small footprint means the finished machine should be easy to tuck underneath a TV or monitor without looking like a traditional desktop gaming PC.
The downside is that I’m going to have to work within some fairly strict hardware limitations.
Every component has to be considered carefully.
The Starting Hardware
The machine originally came with an Intel Core i5 processor, but one of the first things I decided to change was the CPU.
I’ve now upgraded it to an Intel Core i7-8700.
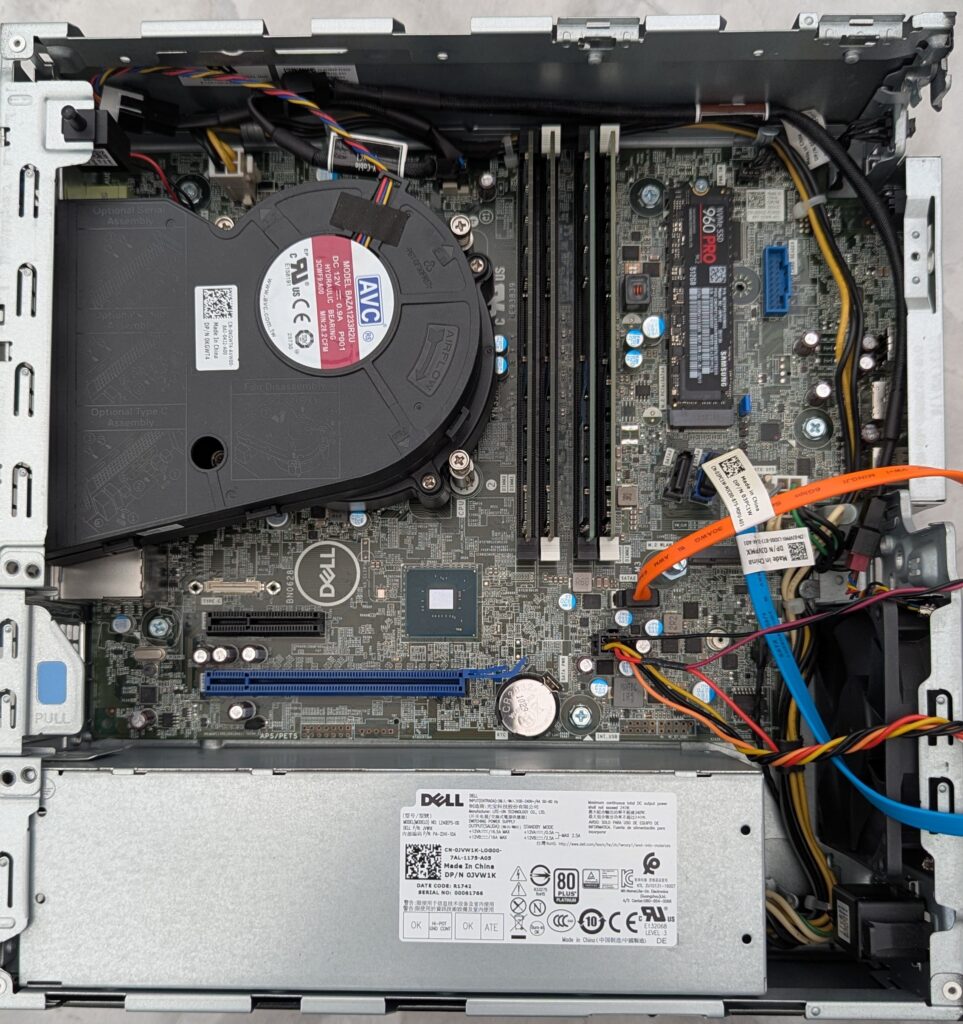
The system also has 16 GB of RAM, a 512 GB Samsung NVMe drive and a 4 TB Seagate IronWolf that I had available as secondary storage.
I’ve also upgraded the power supply from the original 200 W configuration to a 240 W PSU.
Current Specification
| Component | Specification |
|---|---|
| System | Dell OptiPlex 5060 SFF |
| Operating System | Batocera Linux |
| Architecture | x86_64 |
| CPU | Intel Core i7-8700 |
| CPU Cores | 6 |
| CPU Threads | 12 |
| Maximum Frequency | 4.6 GHz |
| Memory | 16 GB |
| Primary Storage | 512 GB Samsung NVMe |
| Secondary Storage | 4 TB Seagate IronWolf |
| Power Supply | 240 W |
| Graphics | Intel UHD Graphics 630 – currently |
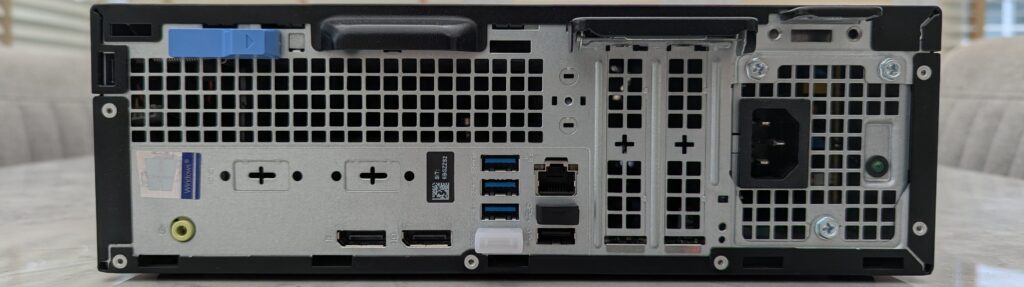
| Additional Cooling | Front exhaust fan |
| Controllers | GameSir Cyclone 2 / EasySMX D05 |
| Future GPU | MSI RTX 3050 Low Profile |
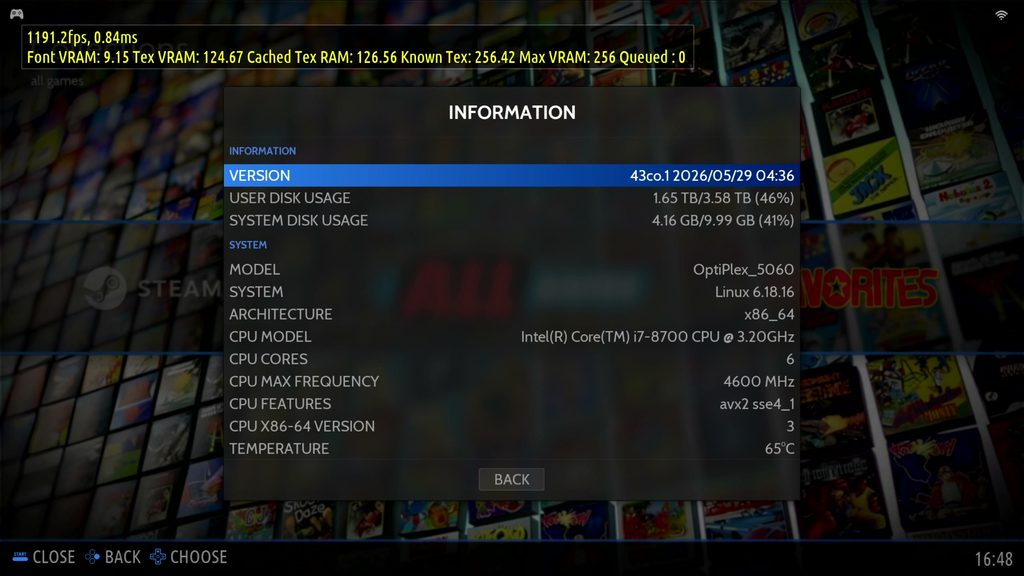
Batocera currently reports the system as:
- Linux 6.18.16
- x86_64 architecture
- Intel Core i7-8700 @ 3.20 GHz
- 6 CPU cores
- 4.6 GHz maximum frequency
- Approximately 15.8 GB memory available
Why the i7-8700?
The Intel Core i7-8700 offers a very good balance between performance, core count and power consumption.
I’m not simply looking for the fastest processor I can install.
The OptiPlex is constrained by its Small Form Factor chassis, cooling and, most importantly, its 240 W power supply. I therefore need to balance performance with the amount of power and heat the system can realistically handle.
The other reason I chose the i7-8700 is its 6 cores and 12 threads.
This becomes particularly important as I move beyond traditional retro consoles and into PlayStation 3 emulation.
The PS3 is an unusual console from an emulation perspective. Its Cell Broadband Engine was built very differently from the conventional x86 processors found in today’s PCs. RPCS3 has to translate the behaviour of that highly parallel architecture into instructions that my Intel CPU can execute.
As a result, PS3 emulation can be extremely CPU-intensive, and having additional CPU threads available can make a significant difference in demanding games. Six cores sits right at the minimum RPCS3’s own community generally recommends for the more demanding open-world titles, so this is a foundation rather than a huge margin of comfort.
The i7-8700’s Hyper-Threading, combined with its strong single-core performance, gives me a useful amount of CPU headroom without moving to a much more power-hungry processor.
This is particularly relevant because I’ve already managed to get some PS3 games running on the system.
However, the more demanding titles quickly demonstrate that PS3 emulation isn’t simply about having a fast CPU.
The GPU and the specific game being emulated also become increasingly important.
For the systems I’m targeting, the i7-8700 gives me a strong foundation.
Why Not the i7-8700K?
The obvious question is why I didn’t go for the i7-8700K instead.
On paper, the K-series processor looks like the more attractive choice.
For this project, however, I don’t think it makes sense.
The OptiPlex motherboard doesn’t give me the overclocking capabilities needed to take advantage of the unlocked multiplier.
That means I’d effectively be paying for a feature I can’t use.
There’s also the power consideration.
The i7-8700K has a higher power envelope, and adding unnecessary power consumption to a system already constrained by a 240 W PSU seems pointless.
I would rather keep the additional power headroom available for the component that could make the biggest difference to the project: the graphics card.
For this particular build, the standard i7-8700 is therefore the more sensible choice.
Storage – Fast Where I Need It
The next part of the build was storage.
I wanted fast storage for Batocera and performance-sensitive emulator data, but I also wanted plenty of capacity for my ROM collection.
Rather than putting everything onto one drive, I’ve split the storage into two.
512 GB Samsung NVMe
The primary drive is a 512 GB Samsung NVMe SSD.
This is where Batocera is installed.
The NVMe also holds a second partition I’ve set aside specifically for RPCS3 and Xenia’s cache data — the shader and game caches these emulators generate benefit hugely from fast storage, so keeping them off the spinning disk entirely made sense. I’ll cover exactly how I’ve wired that up in Part 5.
I don’t need a huge NVMe for this project.
Instead, I’m trying to use the faster storage intelligently.
Crucial P310 500GB NVMe SSD
This is the drive I’d point you toward for the OS and cache partition split covered in this build — a genuine NVMe at a sensible price and capacity. The smallest Samsung NVMe currently available is 1TB and priced well beyond what this build actually needs, so this is the more sensible starting point if you’re buying one specifically for this project.
Check the current price and availability on Amazon UK.
Affiliate Disclosure: This post contains Amazon affiliate links. If you purchase a product through one of these links, I may earn a small commission at no additional cost to you. I only recommend products that I have personally used or believe are worth considering.
4 TB Seagate IronWolf
I also installed a 4 TB Seagate IronWolf as the secondary storage drive.
This is going to be the main repository for my ROM collection.
However, this is another example of why my actual build cost isn’t representative of what you necessarily need to spend.
I already had the 4 TB Seagate IronWolf NAS drive sitting around.
It was effectively spare hardware, so it made perfect sense to reuse it.
It’s also arguably overkill for a Batocera ROM repository.
If you’re building a similar system from scratch, you absolutely do not need an IronWolf NAS drive.
A cheaper SATA hard drive with enough capacity for your game collection will be perfectly adequate.
The important thing for me was reusing hardware rather than buying something new.
Seagate Barracuda 4TB Hard Drive
This Barracuda is the cheaper, perfectly adequate alternative if you’re buying a drive specifically for this project.
Check the current price and availability on Amazon UK.
Affiliate Disclosure: This post contains Amazon affiliate links. If you purchase a product through one of these links, I may earn a small commission at no additional cost to you. I only recommend products that I have personally used or believe are worth considering.
Adding More Cooling
The SFF chassis doesn’t have the airflow of a conventional gaming PC, so I wanted to improve the cooling before putting the system under sustained emulator loads.
I added an additional fan at the front of the chassis, positioned so that it pushes air outwards.
The idea is to help force warm air out of the case rather than allowing hot air to build up inside the relatively compact enclosure.
This should become even more important once I install the RTX 3050.
Adding a dedicated graphics card will introduce another significant source of heat into the system, so I wanted to improve the airflow before getting to that stage.
I’m not expecting the additional fan to make a dramatic difference to idle temperatures.
The real test will be what happens under sustained CPU and GPU load.
Installing Batocera
With the hardware upgrades underway, the next step was installing a fresh copy of Batocera Linux.
Batocera is particularly well suited to this project because it turns the PC into a dedicated emulation platform rather than a conventional desktop computer.
For a standard modern PC, Batocera provides an x86_64 build, which is the architecture I’m using on the OptiPlex. The official Batocera documentation recommends downloading the image matching your hardware architecture and flashing it to the target storage using an imaging tool.
For my build, I installed Batocera directly onto the 512 GB Samsung NVMe.
I’m deliberately using a clean installation for this project.
That gives me a known starting point and means I can document exactly what I’ve configured rather than carrying over settings from another installation.
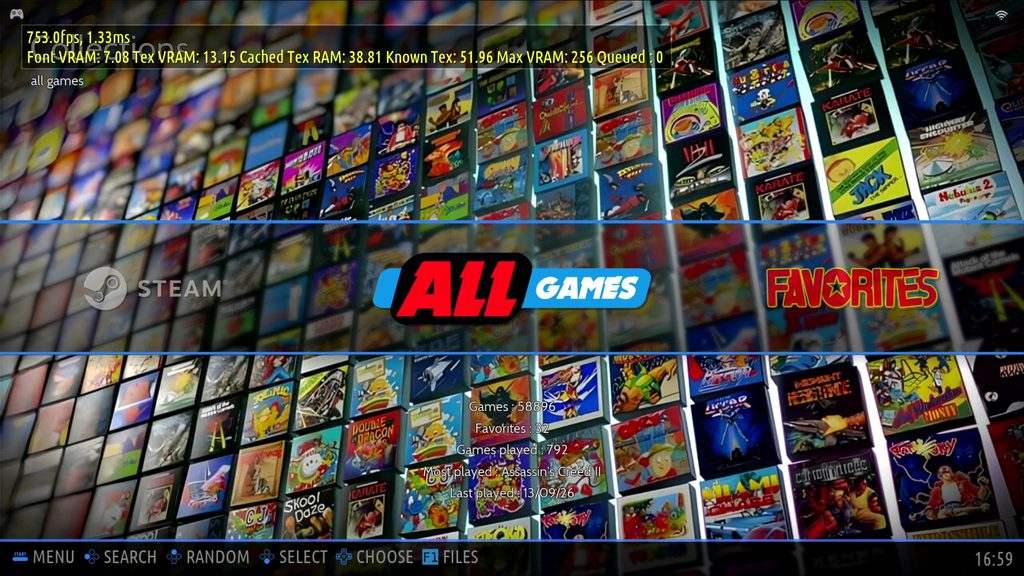
A quick note on sequencing: I’d already got this initial Batocera install running — enough to benchmark the machine on integrated graphics and get some early PS3 games booting — before installing the GPU. For the series, though, I’m covering the full install and configuration process in Part 4, after the hardware upgrades and GPU install, so anyone following along from scratch has a clean, complete walkthrough rather than a half-finished one.
Where the Build Is Now
At this point, the basic hardware platform is complete.
I have:
- Dell OptiPlex 5060 SFF
- Intel Core i7-8700
- 16 GB RAM
- 512 GB Samsung NVMe
- 4 TB Seagate IronWolf
- 240 W PSU
- Additional front exhaust fan
- Batocera installed
- GameSir Cyclone 2 controller
- EasySMX D05 controller
I’ve also configured the system sufficiently to get into actual gaming.
The machine is currently capable of running a wide range of older systems, and I’ve already managed to get some PS3 games running.
However, heavier PS3 titles are where the limitations of the current integrated graphics become obvious.
That’s why the next stage of this project is going to be particularly interesting.
Bringing in the RTX 3050
When I originally started this project, I wasn’t sure whether I would actually buy a dedicated graphics card.
The whole point was to reuse hardware I already had.
But after getting the system running and seeing what it could do, I decided I wanted to push it further, which is where the MSI RTX 3050 Low Profile comes in.
The RTX 3050 is particularly interesting for this build because the OptiPlex SFF has two major constraints:
Physical size
The graphics card needs to fit inside the SFF chassis.
That means a conventional full-height gaming GPU simply isn’t an option — and, as it turns out, “fits in the case” and “fits in the slot I expected” aren’t quite the same question. More on that in Part 3.
Power
The system has a 240 W power supply, so I need to be careful about how much power the graphics card introduces into the system.
The MSI RTX 3050 Low Profile is therefore a particularly interesting choice.
It’s compact, designed specifically for smaller systems and provides considerably more graphics performance than the Intel integrated graphics.
But I’m not going to assume that installing it will magically make every PS3 or Xbox 360 game playable.
That’s what the testing is for.
What I Want to Find Out
The next stage of this project is where things get really interesting.
I want to establish what the system can do before and after the RTX 3050.
I’ll be looking at:
- PS2 performance
- Original Xbox performance
- PS3 performance
- Xbox 360 performance
- Frame rates
- Frame-time consistency
- CPU utilisation
- GPU utilisation
- Temperatures
- Resolution
- Emulator settings
- Game-specific configuration
Most importantly, I’ll be using actual games and actual results from this machine rather than simply relying on theoretical specifications.
I’ve already managed to get some PS3 games running.
The question now is whether adding the RTX 3050 will turn the system into a genuinely capable PS3 and Xbox 360 emulation machine.
The Build Series
This is Part 1 of my Batocera retro gaming PC build.
I’ll be documenting the project from the initial hardware upgrades right through to the final configuration and performance testing.
The planned build:
Part 1 – The Project & Dell OptiPlex 5060
The article you’re reading now.
Part 2 – Hardware Upgrades
The CPU upgrade, the PSU swap, additional cooling and the other physical changes I made to the OptiPlex before it was ready for a discrete GPU.
Part 3 – MSI RTX 3050 Low Profile
Physically installing the card, the PCIe slot discovery I mentioned above, and the diagnostics I ran to confirm it was actually running at full health once it was in.
Part 4 – Installing Batocera
A detailed look at the Batocera installation and initial configuration, covered from scratch for anyone following along.
Part 5 – ROM Storage & NVMe Cache
How I’ve configured the 4 TB drive as the main ROM store and set up a dedicated NVMe partition for PS3 and Xbox 360 cache data.
Part 6 – Controllers & Initial Testing
Getting the GameSir and EasySMX controllers working, plus general baseline testing across the emulation range.
Part 7 – PS3 & Xbox 360 Testing
The real test. Game-by-game results, per-title RPCS3 and Xenia configuration, and the troubleshooting that came with it.
Part 8 – Final Build & Results
The complete hardware list, total cost, final performance results, and an honest look at what did and didn’t go perfectly.
What’s Next?
The OptiPlex has gone from being an old office PC to the foundation of what could become a surprisingly capable retro gaming machine.
I’ve upgraded the CPU.
I’ve added fast NVMe storage.
I’ve added 4 TB of storage for the ROM collection.
I’ve improved the cooling.
I’ve installed Batocera.
And I’ve already managed to get some PS3 games running.
Now I’m about to add the biggest upgrade of the project:
an MSI RTX 3050 Low Profile.
It’s sitting on my desk ready to go in, and I’m going to find out whether this little SFF Dell can really handle the more demanding side of emulation.
Part 2 will cover the hardware upgrades in detail, including the i7-8700, the PSU swap and the cooling changes.
Then we’ll get to the interesting part:
Can a 240 W Dell OptiPlex 5060 SFF really become a serious PS3 and Xbox 360 emulation machine?
Let’s find out.